Friday, March 25, 2011

Jewelry Design 101: Wire-Wrapping Pt. 2

Wire-wrapping top-drilled beads is slightly more complex than wire-wrapping centre-drilled beads, but with a little practice, you're certain to pick it up quickly!

You will need: beads, wire, round-nose pliers, flat-nose pliers, and cutting pliers. I suggest that beginners use craft wire to practice. Please see Jewelry Design 101: Wire-Wrapping Pt. 1 for a description of the different pliers used and the difference between centre and top-drilled beads.

How to Wire-Wrap Top-Drilled Beads
The follow instructions apply for a bead 0.7 mm wide and 1.1 cm long. You should use a longer piece of wire for larger beads.
  1. Insert a 6 cm piece of wire into the bead hole so that circa 1 cm of wire comes out of one end. This end will be the 'short end'.
  2. Bend the short end up flush with the side of the bead.
  3. Bend the long end up flush with the side of the bead.
  4. Using flat nose pliers, straighten the long end of the wire. The two wire ends should overlap.
  5. Grip the bead with your fingers and twist the short end of the wire around the long end of the wire once or twice.
  6. Trim any excess of the short wire with the cutters and tuck in the end with the flat nose pliers.
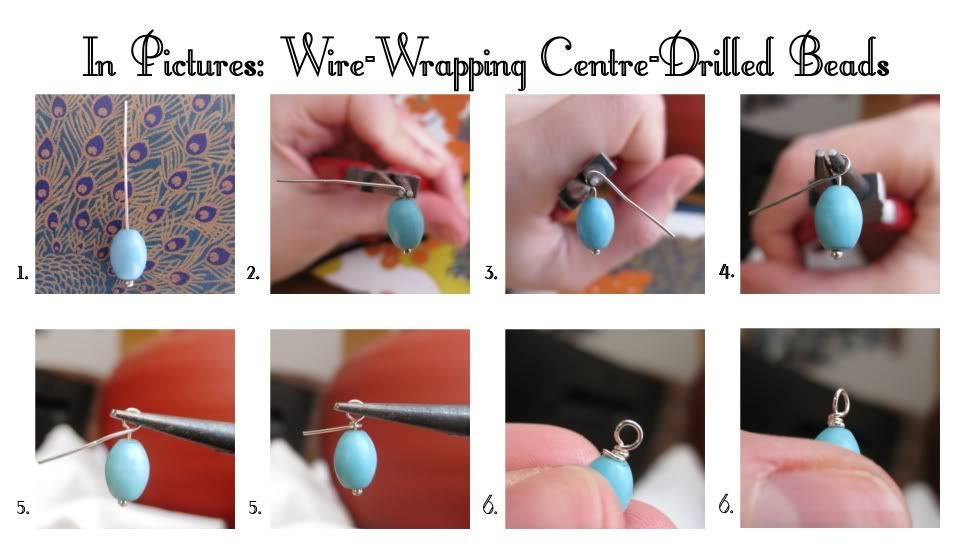
  7. Grasp wire with round-nose pliers (pliers should be flush with the top of wrap you just completed). Bend wire at a 90 degree angle. 
  8. Reposition pliers and grasp the wire just past the bend. With your fingers, wrap the wire around the round jaw of the pliers to create a loop.
  9. Reposition pliers and continue wrapping wire around the pliers until you form a complete loop. *At this point, you may choose to insert another looped wire, or a chain link into the loop before closing it. This is optional.
  10. Grasp the loop with the round-nose pliers and use your fingers to wrap the wire around the base of the loop at least 2 to 3 times. You may choose to continue wrapping the wire until it overlaps the top of the bead.
  11. Using your cutting pliers, cut the excess wire flush with the bead. Tuck in the end of the wire with the flat-nose pliers.
Varriations


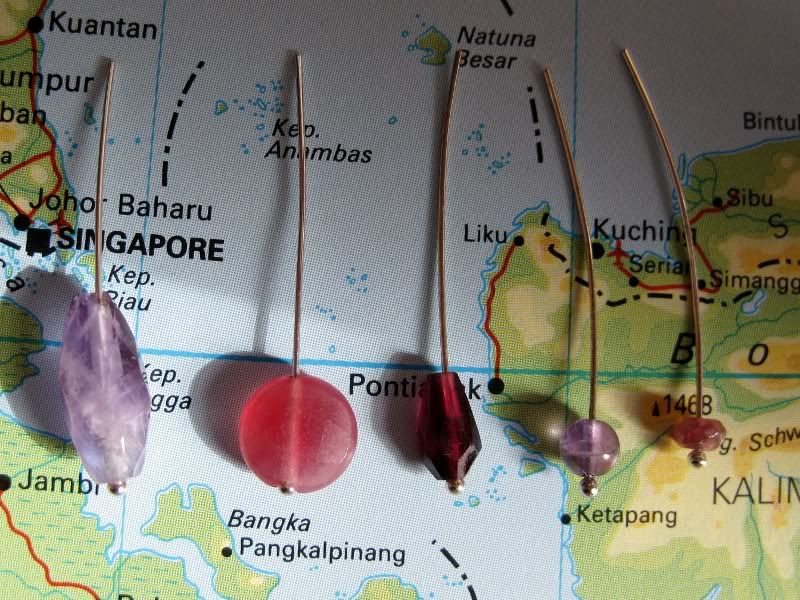
You may choose to wrap the wire around the tip of the bead (as described in the instructions), wrap only to the tip of the bead, or thread small beads onto the wire as you wrap.

Saturday, March 5, 2011

Jewelry Design 101: Wire-Wrapping Pt. 1

Mastering the skill of wire-wrapping is essential for every budding jewelry designer. In this first installment, I will go through the basics, describing materials and tools, and show you how to wire-wrap a centre-drilled bead.

Basics
You will need: beads, wire, headpins/ballpins, round-nose pliers, flat-nose pliers, and cutting pliers. I suggest that beginners use craft wire to practice.

From left to right: round-nose pliers, flat-nose pliers, cutters.

You will use round-nose pliers to shape round loops, flat-nose pliers to tuck in loose ends, and cutters to cut your wire.

There are two types of beads: centre-drilled and top-drilled. The positioning of the hole determines the wire-wrapping technique you will use.

In centre-drilled beads, the hole runs from top to bottom through the middle of the bead.

From left to right: elongated drop bead, coin bead, teardrop briolette, round bead, rondelle.

In top-drilled beads, the hole runs from left to right through the top of the bead.

Flat briolette.

How-To Wire-Wrap Centre-Drilled Beads

  1. Insert ballpin into bead.
  2. Grasp wire with round-nose pliers (pliers should be flush with the top of the bead). Bend wire at a 90 degree angle. 
  3. Reposition pliers and grasp the wire just past the bend. With your fingers, wrap the wire around the round jaw of the pliers to create a loop.
  4. Reposition pliers and continue wrapping wire around the pliers until you form a complete loop. *At this point, you may choose to insert another looped wire, or a chain link into the loop before closing it. This is optional.
  5. Grasp the loop with the round-nose pliers and use your fingers to wrap the wire around the base of the loop 2 to 3 times. 
  6. Using your cutting pliers, cut the excess wire flush with the bead. Tuck in the end of the wire with the flat-nose pliers.

Above is a finished product. In this case, I inserted a chandelier finding into the loop before closing it (step 4).

In the next installment, I will show you how to wire-wrap a top-drilled bead.